Adapters & Fittings
IBM ThinkPad T22 External SD Card HDD Caddy
SKU 3DPW-pr-152483
$121.00NZD
In stock · Made-to-order resin · Ships from Auckland · Free shipping over $75
- Material
- High-Detail Resin (8K)
- Colour
- Grey
- Weight
- ~40 g
- Print time
- ~4.5 h
- Shipping
- $10 std · $20 express
- Lead time
- 1-3 d print + 1-4 d ship
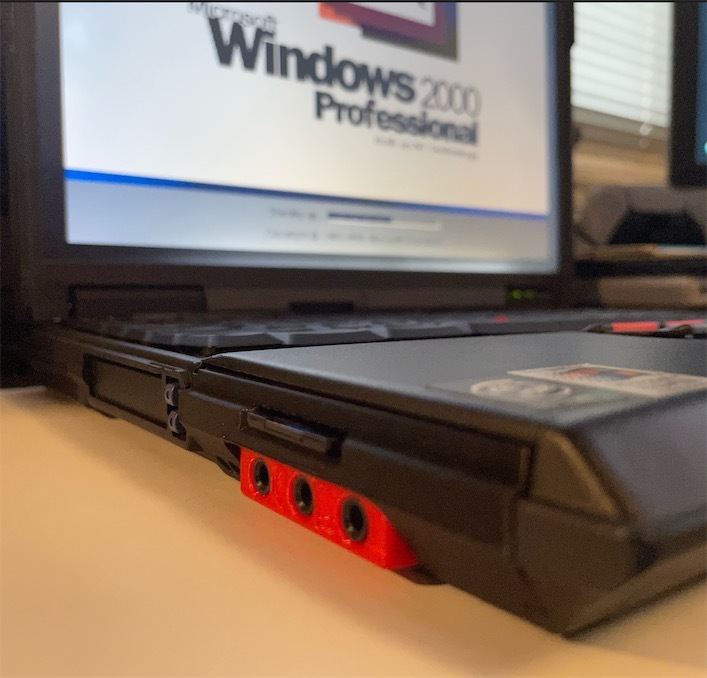
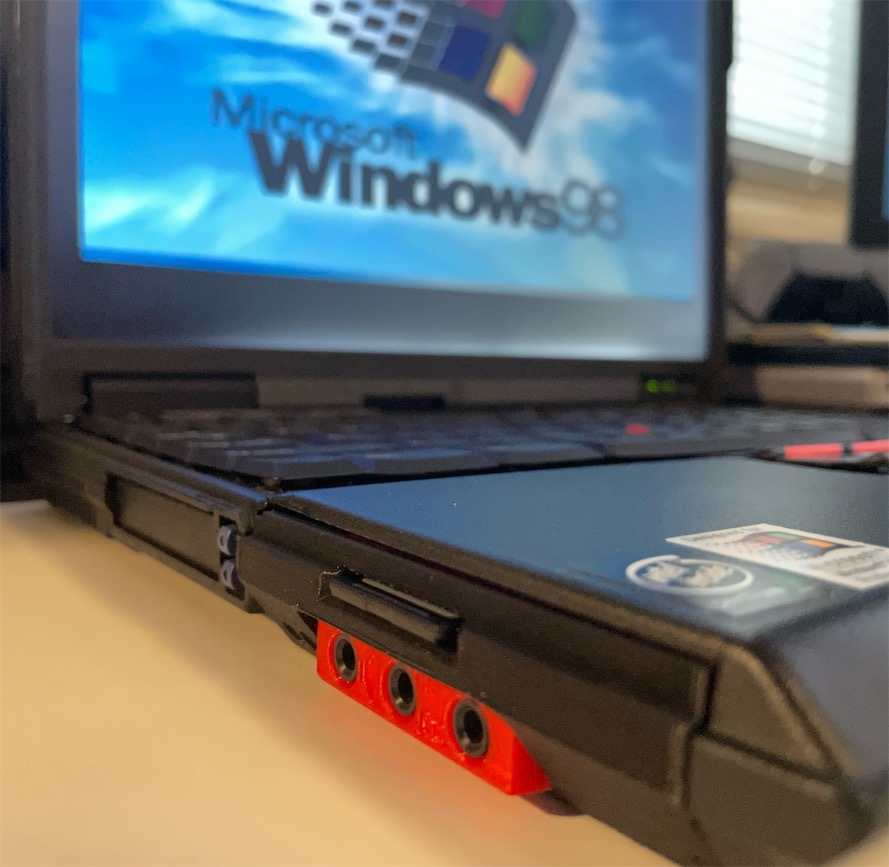
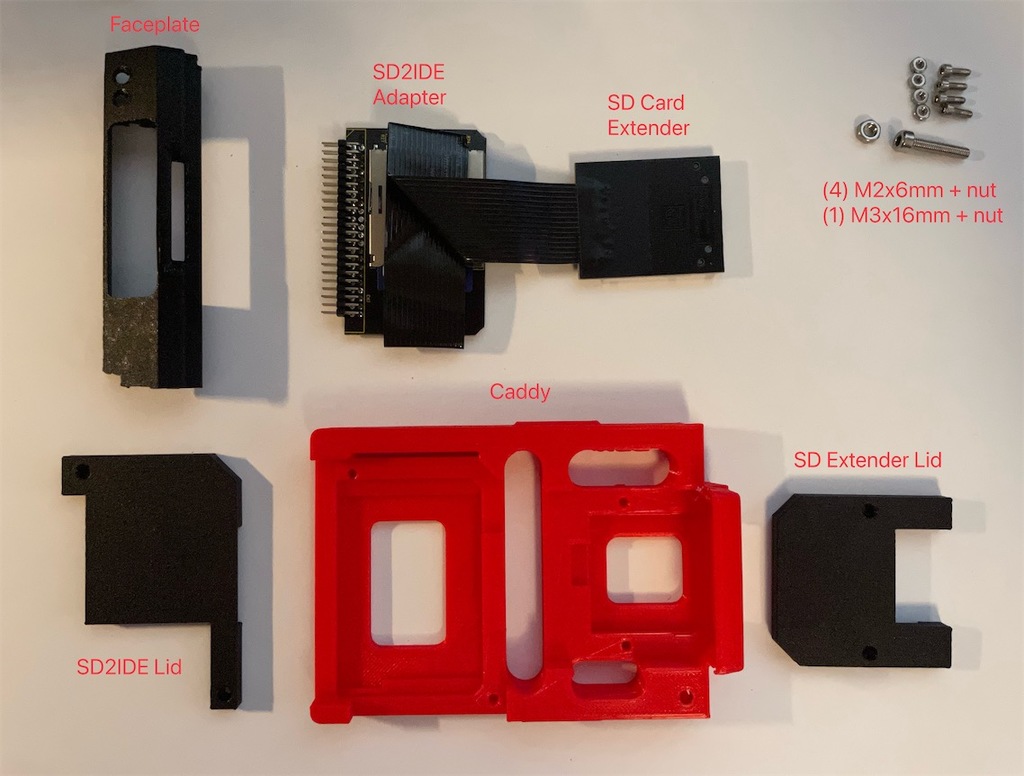
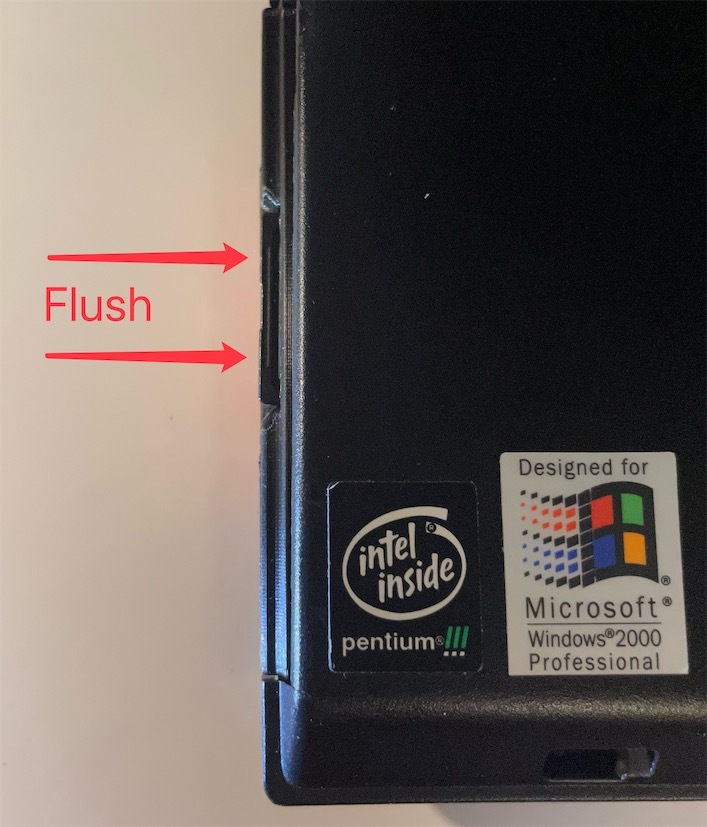
This time, I came into possession of a T22 without the HDD and the cover. So it is only obligatory for me to come up with something just like the IBM ThinkPad 560Z External SD Card HDD Caddy. With this SD2IDE caddy, you can use an SD card as the internal storage for this laptop, and easily swap it out for a different one. Supposedly, this one is also compatible with T23. However I don't have one to test it out. PartsScrew & nuts https://www.amazon.com/gp/product/B014OO5KQG/SD2IDE Adapter https://www.amazon.com/gp/product/B08SK4G7RP/ SD Card Extension (15cm cable length)To shuck the SD card extender, insert a flat piece of tool into the opening and twist. We don't use the shell. PrintingPrint all models in their original orientations. The parts should be printed with support. Try tree support as it wastes less plastic and is easier to remove in one go. I printed my parts in a black/red color scheme. You can go for a pure black one for more stealthy effects. AssemblyInsert the SD extension into the SD2IDE adapter. Drop both of the into the cavities in the caddy. Fold the excessive ribbon cable as shown in the picture. Cover the lids onto the adapters and screw them down with 4 sets of M2x6 screw and nut. If you ended up with more slack with the ribbon cable, try to fold them within the slack areas as shown in the photo. Tuck some of it below the SD2IDE lid to make sure they don't come loose. Put the faceplate onto the caddy as shown in the pictures. The top of clamp on the faceplate should be flush with the top of the caddy. Make sure the "chin" part of the caddy is not stuck out side of the faceplate. Drop a M3 nut into the hole. You can tighten down the nut all the way into the bottom of the hole with the help of an M3 screw, then undo the screw and add a drop of super glue to secure this nut in place. InstallationSlide the caddy into the HDD cavity on the laptop. Make sure the three 3.5mm sockets come through the holes, then press the assembly all the way in so the IDE pins engage with the IDE socket. Screw in the M3x16 screw into the hole on the bottom of the laptop, all the way in, but don't over tighten it. The screw head should be flush with the caddy surface. Test the installation with an SD card. It should go in smoothly without much resistance. Once in place, the outside of the SD card should be flush with the edge of the laptop. Finally, verify that the screen lid can close correctly. And that's it! Tips & TricksYou MUST insert an SD card into the adapter BEFORE powering on the machine. Inserting one after powering on will not work.If you want to swap the SD card, you need to power down the machine before swapping the card.From my tests, Windows 9X and Windows 2000/XP setup programs don't like partitions bigger than 4GB on this card.For Windows 2000/XP, only create a partition smaller than 4GB (I did 3000MB) for installation, and then expand it or create additional partitions with a partition tool to the full size of the SD card,For Windows 9X, boot with FreeDOS, create a small partition around 2GB, then install EZ drive BIOS overlay onto the HDD. Then boot from the HDD with EZ BIOS, then into FreeDOS and partition the disk however you like.Category: Computer
Tags: adapter, hdd, thinkpad, sdcard, caddy, thingiverse, resin print, nz made, made to order
Design credit: Original design by Jeff Chen - licensed under CC-BY.
View original model + STL files on Printables ↗
View original model + STL files on Printables ↗
Frequently asked
How long does shipping take?
IBM ThinkPad T22 External SD Card HDD Caddy is printed to order. Lead time is typically 1-3 business days plus 1-4 days NZ shipping. Standard NZ shipping is $10, free over $75.
What material is this printed in?
By default this is printed in High-Detail Resin (8K) at 0.025 mm layer height on an MSLA resin printer. Custom material and colour swaps are available, just leave a note at checkout.
Can I get this in a different colour?
Yes. Every product can be printed in any of the resin colours we stock, or hand-painted on request. Leave a note at checkout or email hello@3dprintworld.co.nz.
Do you ship outside of New Zealand?
Currently New Zealand only. Australian shipping is coming.
Who designed this?
Designed by an independent sculptor and licensed for commercial printing. The original is linked on this page.